 It is truly important to visual take the time to study your Subject! This may seem obvious, yet young artist seem to miss the obvious all too much! I will often look at objects through an artist eye. Meaning, I will try to see Light and Dark, shading, and basic shapes. If you practice this, you will be able to improve your observing skills. I found that I learned the most when I watched another artist work.
Monday, February 8, 2010
Practice Draw what you see
It is truly important to visual take the time to study your Subject! This may seem obvious, yet young artist seem to miss the obvious all too much! I will often look at objects through an artist eye. Meaning, I will try to see Light and Dark, shading, and basic shapes. If you practice this, you will be able to improve your observing skills. I found that I learned the most when I watched another artist work.

Thursday, February 4, 2010
Shading on Basic Shapes
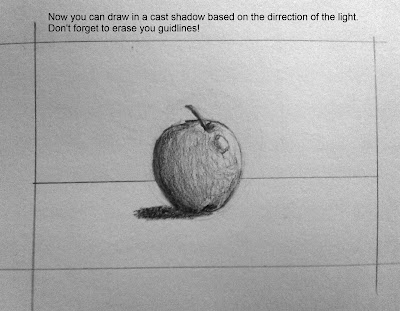
Now we will work with basic shapes. I often use shapes to this day to help me with the structure of a drawing. Utilizing shapes can help you get proportions correct.
Here are the basic shapes that I use.
Let's start off easy. we will use the Circle.


Here are the basic shapes that I use.

Let's start off easy. we will use the Circle.


Wednesday, February 3, 2010
Draw What you See!
In this next exercise we need to learn to draw what we see, not what we think that we see. You will see below, two different drawings. The one on the left is without looking at the page, and drawing what I thought that I was seeing. The drawing on the right is an example of drawing what I was seeing not what I thought I was seeing. 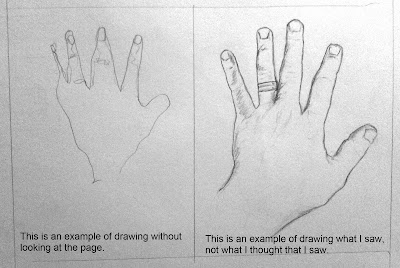
Now you can try. Try to draw something in front of you without looking at the page first; then it while drawing what you are actually seeing.

Now you can try. Try to draw something in front of you without looking at the page first; then it while drawing what you are actually seeing.
Tuesday, February 2, 2010


Monday, February 1, 2010
How to draw from a one point perspective
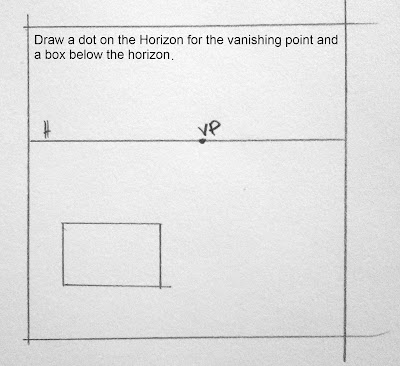
Perspective is everything! Even in our lives in general; it is everything sometimes even past the truth. In one sense perspective is based on the artist. In other words, an artist can choose to break the rules; however, there are some universal truths about perspective that will help you drawings come to life. Lets try One Point Perspective and then two...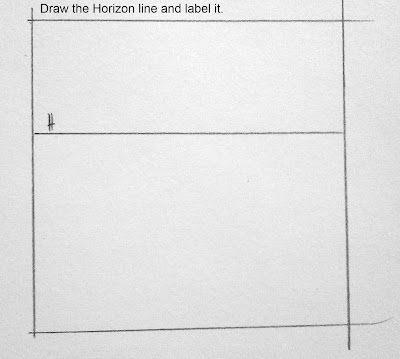
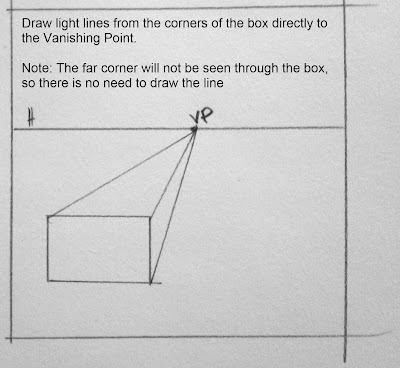
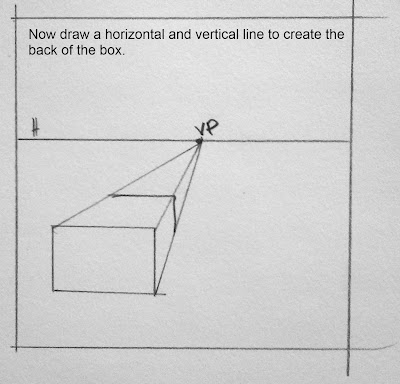
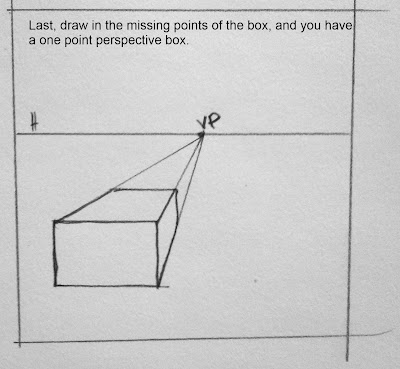
I hope that this helped...just post a question if you Have any.


I hope that this helped...just post a question if you Have any.
blending
I was able to take some video of the latest drawing that I did. I thought it might be helpful to those were interested in seeing how I Draw skin. This involved outlining the subject and shading and blending.
Sunday, January 31, 2010
Tools and Materials

Drawing is an important Art form in and of itself all the way down to Signing your name.
Drawing starts as lines and circles which evolve into shapes; add light and dark shading and you drawing can come to life! Materials for drawing are not expensive, and I love the fact that you can draw just about anywhere. As you improve you will desire a "new edge" and the need for more expensive tools will come. You want to always make sure that your work will be preserved for as long as possible. This is why I say, "Never
 draw on lined notebook paper unless that is part of your idea!" here is a list of items that I use and may be helpful to you:
Sketch Pads - I use nothing less than 70lb paper but prefer +100lb
Workspace - this could be an isle, desk, drawing board, or a comfortable workable space for you.
Artist's Erasers - I recommend a kneaded eraser as it is soft on the page and mold-able.
Blending tools - I use paper blending stumps, cue tips, and a soft form of tissue paper.
Pencils - I enjoy using a range of Derwent graphic pencils.
Charcoal - I use primarily the charcoal pencils, but you can use sticks as well.
Sharpener - I would avoid electric sharpeners or anything that would waste the pencil!
Fixative - This is merely a way to help preserve and protect your drawings
I purchase the majority of these supplies at a HOBBY LOBBY.
Hope that this helps and our next lesson will be on Perspective.
email me any questions at joe(at)joeeverson.com
humbly,
Joe Everson
Subscribe to:
Posts (Atom)
LinkWithin
